Archive for the ‘Cars’ Category

1988 Crown Coach School Bus Conversion

August 24, 2019
 by 

Over a decade in the making, I finally took the plunge and bought a school bus to convert it into an Orient Express style train car for the highway. It’s been aptly named the Disorient Express.

This is something I’ve been thinking about ever since moving to California in 2004 and riding in friends buses and art cars at Burning Man. In particular I’ve always had my eye on Crown Coach school buses. Besides their beautiful 1950′s styling, they were well built with standard big rig parts making it easy to maintain and the skin is aluminum so it won’t rust. I almost bought one back in 2007 but the buyer backed out at the last minute so I abandoned the idea knowing one day I’d get back to it.

That day came in November of 2017 when I was browsing eBay and Craigslist as I like to do from time to time. This beautiful 1988 Crown from Merced School District came up for sale with only 84k miles on it. I knew right then and there that this was what I had been waiting for.

A few days later the project was in full swing. I had friends coming by to help to remove all the seats and get the bus ready for its new life; a dining car and lounge suitable for entertaining as well as a sleeping quarters, bathroom, and kitchen. This project has been a huge undertaking including extensive woodworking, plumbing, and electrical. None of this would be possible without the help of many willing and able friends who are just crazy enough to follow along for the journey.

Here are few photos of what the bus looks like now but if you’d like to follow along with the progress checkout the Disorient Express on Instagram.

Flintstones art car is coming together

August 18, 2009
 by 

With Burning Man less than two weeks away my buddy Aaron and I are getting close to completion. All the finish work adds up but its the most exciting part. All the details are what makes this car authentic. Just recently Aaron finished rounding and staining the canopy supports and I finished rewiring the thing. All the seats are now upholstered and I just finished painting on the faux stone on the car.

In the picture above you can see that we now working the side logs what I think we have figured out. Below you can see all the switches and lights. We hollowed out bones to cover the switches and shells cover the indicators but glow at night.

For more pictures check out my Flickr page.

Flintstones themed art car for Burning Man

June 16, 2009
 by 

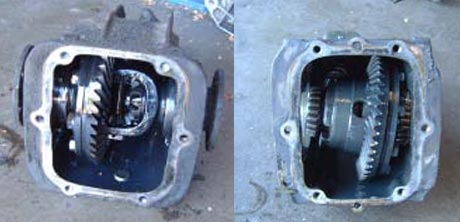
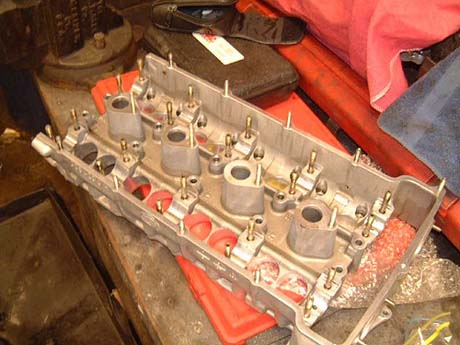
This year, my friend and campmate Aaron and I decided to take our skills and build something for ourselves, on top of our usual Duck Pond duties. We had been talking about an art car for a while and my friends old one just kinda fell into our lap. Above you can see a picture of what we are working with.

We bought this cart as well as a trailer with benches on it that was setup to hold about 6 to 8 people. It was owned and operated by my friend Andy under the name ‘Liberace’. It’s seen many trips to the playa with them and before that it was owned by someone in the Space Cowboys. Pictures of its past life can be seen here on Flickr.

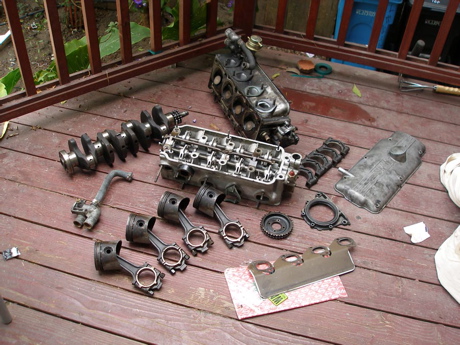
The cart is of an unknown manufacturer, displacement, and any real history. All names and logos are long gone and stripped off. What I do I know is its a simple bidirectional 2-stroke motor with a small single barrel carburetor and a centrifugal drive mechanism. The part I found strange was that there is no idle. When you lift your foot from the gas the motor turns off. Just as well, its more environmentally friendly and wastes less gas. Nevertheless, I’m pretty happy with it as it is a simple drive mechanism and much easier than the car I usually work on.

The inspiration

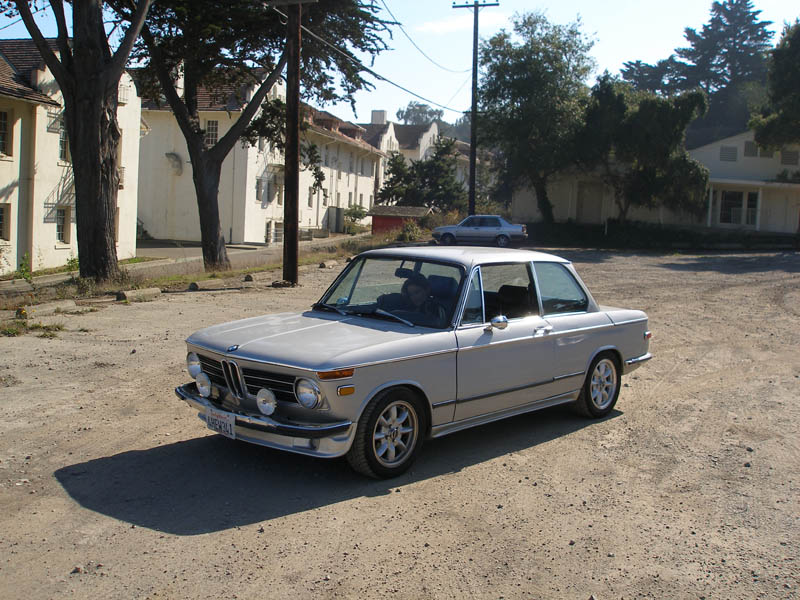
As you can see from the picture above its a pretty uninspired looking cart. Rather than slap some color and fur on it and call it a day, we wanted to create something different with a lot of attention to detail. Something that would grab the attention of passerby’s on the Playa. The Flintstones idea, like many good ideas, came to us out the blue when we were thinking of other ideas.

The picture above is our inspiration photo. I found it on one of my favorite maker sites, instructables.com. A family had made it for their kid and its a perfect jumping off point for us to follow. I also got the ideas for the fake wooden side rails made of foam from them. The article can be found here.

The idea

As I mentioned before, our idea is to be very authentic and detailed. We are using real bones for handles, twine to hide modern bolts or materials, and all of our electronics will be hidden. We are also using real wood and branches wherever possible to complete the look. Below is a sketch of the vehicle.

(click image to see a larger version)

Our car is going to be mostly operating without the trailer behind it. Although we will take it out from time to time, its mostly a personal transport/ice hauling vehicle. On the back, we will have a bench seat and removable foot rest for when we are not using the trailer; however, when the trailer is in use we will remove it and not allow people to sit back there as it is dangerous. For more pictures of the trailer please see my Flickr page.

The most complicated part of our project is going to be the wooden canopy. Not only is it going to be tough to turn 4×4 square pieces of wood into round looking branches, we will need a lot of support structure. We are going to be bolting the canopy into the frame rails as well as using metal pipe to support the heavier components of the canopy.

(click image to see a larger version)

Once the final structure is said and done, we will wrap all the joints and cover all metal pieces with twine to keep the look authentic. And of course we will have a burlap white canopy to shield us from the sun.

Our next challenge will be to add modern electronics without having them show and ruin the look we are going for. We are going to be adding a small 50-or-so-watt stereo and speakers in the dash as well as some other lights and switches. Below is a sketch of the fake slate dashboard we will be building.

(click image to see a larger version)

The trailer

Below is a photo of the trailer. It can hold three people on each of the side benches and two on the back bench. Time permitting we are going to tackle the redesign of it but as of now we have our hands full. Luckily for us its fully operational and ready to go, it just needs more lighting.

The lighting

We do plan on driving at night so we will clearly illuminate our car and trailer. We plan on having a few different types of lighting. The first and most blatant for safety will be amber lights underneath the car on all sides. Not only will it help others see us, it will us to get on and off. The second type of lighting will be under-canopy lighting that will be red to allow us to see while others will be able to see us. I feel that should be enough; however, we are planning on creating some lanterns with dim little flicker bulbs hanging off the canopy and maybe on the front to really help complete the look.

Our trailer will also be equipped with lighting in the case we want to take our friends out at night. It barely had lighting when we got it from our friend other than the rear red running lights. We will add amber underneath/side lights to clearly illuminate the ground below which will help us be seen. Also this will aid in our passengers ability to safely get on and off.

The conclusion

As I’ve said before, when all is said and done we want this car to be true to the theme and interesting to look at out at Burning Man. We are even creating Flintstone character costumes to complete the look. We are not just creating a transport vehicle, we are creating something interesting and artistic, melding form and function and contributing back to the community.

(Follow up post, Flintstones art car is coming together)

New headers and exhaust for the 2002

May 21, 2009
 by 

Finally, after redoing my engine, fuel and air delivery, and spark management I have gotten around to putting on a set of step headers to help the motor breathe a little harder. Since I have 4 individual throttle bodies its only fitting that I let that air get out of the motor faster as well. Also, it will help the engine run a little cooler.

Putting the headers on wasn’t all that hard although it was tricky at first getting them to fit around the tie rods. The trick was to turn the wheels all the way to left and they slid right past. Other than that, fitting the exhaust was real chore! I have always had problems with it rubbing on my rear subframe so this time I was determined to get it right. It probably took 2 or 3 different times taking it on and off after driving it around only to find that something was still rubbing. In the end, what worked best was fitting the exhaust from the collector back, fitting it just right, taking it off and pounding it place so there was no chance of movement. After a few hours of work and help from my house mate it was perfect.

Since I have installed it I have noticed a few things. First off my low end torque has improved. Not by a lot but definitely noticeable. Also, the high end power feels quite improved as well. Once I pass 4k it really screams. Finally, I have noticed my coolant temperature being much lower throughout different duty cycles. Overall, a great buy and a noticeable difference. Thanks again to Ireland Engineering for their great parts.

5-speed and limited slip differential installed

July 31, 2008
 by 

I have owned my 1973 BMW 2002 for 3 years now and put in countless hours of work and changed out nearly everything, except the drive line. Two weekends ago I went up to my friends shop to finally change it all out. I have been running the stock setup from the clutch back for too long. Also, the lack of a 5th overdrive gear is hurting my gas mileage.


The install went pretty smoothly and took only a day to accomplish. While we were putting in the new transmission and driveshaft we also threw out the stock open differential for a 3.9:1 limited slip. I have said this after numerous projects before, but wow it feels like a new car! The transmission is smooth and the shift throw is much shorter and tighter. In conjunction with the new differential gear ratio the gets off the line quicker. Also, since power is put down the wheels evenly it comes out of corners like a race car. Previously with my open differential the car ‘wiggled’ as it regained traction after a hard corner due to the fact that is sends power down unevenly.


To see pictures of the installation check out the Flickr set.

Open differential versus limited slip differential

Open differential vs a limited slip

I’m not going to go into great detail regarding all of the differences because that can easily be Googled. I just wanted to show the the main difference. On left we have my stock differential which is an ‘open differential’. On the right we have my new Limited Slip Differential (LSD) with a gear ratio of 3.9:1.


The major difference and also the major weak point of the open differential are the spider gears. This allows the wheels to spin independently. With the car in the air, I can spin one back wheel and the other one will spin in the opposite direction. The limited slip on the other hand doesnt have those gears. Not only can it handle more power it also makes locks the wheels together. Putting the car in the air and spinning one wheel will make the other spin in the same direction. More information can be found at howstuffworks.com.

New fuel map for the 2002

July 7, 2008
 by 

Fuel map for the ITB BMW 2002Its been a long time since I last tuned the car ever since I started on the new M3 motor. Just as I was getting back into practice and tuning for efficiency given the high gas prices, a friend gave me his fuel map for a similar car also with Individual Throttle Bodies (ITB’s). After about 30 minutes of tuning the car ran superbly!


It had taken me quite a long time to get where I was and from the looks of the map above it would have taken me several more outings. One of my main trouble points was coming back off overrun and right off idle. The latter is a common problem with ITB’s that normal cars dont have with one throttle body. When the throttles quickly open the pressure drops to near full atmosphere and therefore we are getting much better volumetric efficiency requiring more gas.


So far everything is performing wonderfully. The hesitation off idle is gone and the power band is strong all the way up. Also, overrun back onto wide-open throttle is amazing. The fuel efficiency appears to have improved as well. This may not make sense to some but hopefully this is useful to somebody out there (click on the picture above to see a larger image).

BMW M3 head machined and cleaned

April 27, 2008
 by 

BMW M3 cam case cleaned
More photos: BMW M3 head photo set

The M3 head just came back from the machinist about a week ago and it looks wonderful but unfortunately I didnt send off the cam case and other parts to be media blasted along with the head. So this Saturday I spent the day with the parts cleaner at my friends shop A1 Imports Autoworks in San Rafael. It saved me a little bit of money and I had to inventory anyway. I cant wait to put it together!

New looks for the 2002

November 12, 2007
 by 

View from the front Side view of the new mirrors and sillsRecently I have concluded the bulk of the exterior work on the car. The paint isnt perfect buts its actually pretty good especially for a street car. The added side skirts and bullet mirrors help tie it all together. Now to focus on some of the electronics, as well as the new motor. (click the thumbnails for larger pictures)

80′s BMW M3 Motor build up with a 2002 bottom end

September 18, 2007
 by 

BMW M3 S14 motor
Even though I havent even put 7,000 miles on my first motor install I purchased a cheap S14 2.3- liter motor from the first M3. In combination with my other parts lying around, I am going to build a 2-liter M3 motor with the bottom end (M10) from the 2002. Actually, the blocks are identical except for displacement but machining will probably be required to get all the oil and coolant passages to line up. The M10 block has been in production for over 20 years. My friend and mechanic JP Cadoux will be teaching me how to hand build my first motor and I will be teaching him to control fuel and spark delivery with MegaSquirt open-source software.

I dont want to reveal too many details yet because I am not sure what is possible but I have some very exciting ideas. This motor will be completely custom from the machine work to get everything to mate up to the pistons and rods. For what I am trying to build I dont think I’m going to find anything off the shelf. I am going to attempt to use the same camshafts and valve train as well as the M10 2.0 crank of course. Once the machinist has his hands on it I will know more.

Parts cache

August 11, 2007
 by 

In the past few weeks I have fallen into so many parts at such incredible prices I couldnt resist. Some of the parts I acquired are pictured below but some of the ones that arent include a 5 speed, a limited slip 3.9:1 differential, the bottom end to another 2002, and a complete M3 motor from the 80′s that needs to be rebuilt. I am going to be building some interesting things in the near future. I cant wait!

2002 parts

Copyright © 2005-2011 John Clarke Mills

Wordpress theme is open source and available on github.